| Line 101: | Line 101: | ||
Connect the camera via USB and run the script ''focus-snap.py'': |
Connect the camera via USB and run the script ''focus-snap.py'': |
||
python focus-snap.py |
python focus-snap.py |
||
| − | It will display a live preview. If you want to change settings, close the window, press the Live View button on the camera (while it's still connected to USB) and you can change shooting settings. Put a short exposure time, like 1/250, 1/500, to avoid motion blur. |
+ | It will display a live preview. If you want to change settings, close the window, press the Live View button on the camera (while it's still connected to USB) and you can change shooting settings. Put a short exposure time, like 1/250, 1/500, to avoid motion blur. Then run the script again. |
Look at the title bar of the preview window. It should display "Looking for focus peak". Now point the camera at some object and rotate the focus ring. The object will be focused; turn the ring a bit farther, and the object will become blurred. The title bar will say "Focus peak found". Now turn the focus ring back ''sloooooooowly'' and camera will take a picture when the object will come back into focus. |
Look at the title bar of the preview window. It should display "Looking for focus peak". Now point the camera at some object and rotate the focus ring. The object will be focused; turn the ring a bit farther, and the object will become blurred. The title bar will say "Focus peak found". Now turn the focus ring back ''sloooooooowly'' and camera will take a picture when the object will come back into focus. |
||
| + | |||
==How it works== |
==How it works== |
||
My implementation estimates the amount of focus on the live preview image, and take a picture when it detects a peak (well, almost). |
My implementation estimates the amount of focus on the live preview image, and take a picture when it detects a peak (well, almost). |
||
Revision as of 14:22, 3 October 2010
Good news for Python lovers! You can control your DSLR camera with Python scripts via the USB cable, PTP protocol.
I've written a Python binding for gphoto2, called piggyphoto, available here:
http://github.com/alexdu/piggyphoto
The binding is based on ctypes, which means (only in theory) that you don't have to compile anything in order to use it. In practice, the stable version is almost useless, so you have to compile the latest SVN snapshot of gphoto2.
This is a test bed for various enhancements which can be implemented in Magic Lantern.
Related page: PTP
Installing the SVN version of gphoto2
On Ubuntu Karmic, I had to follow these steps:
svn co https://gphoto.svn.sourceforge.net/svnroot/gphoto gphoto
The README files from (lib)gphoto say that the default prefix for installation is /usr/local. Doing so resulted in conflicts with the stable version from Ubuntu package manager. So I've changed the prefix to /usr:
cd gphoto/trunk
cd libgphoto2
autoreconf --install --symlink
./configure --with-prefix=/usr --with-camlibs=canon
make
sudo make install

cd ../gphoto2
autoreconf -is
./configure --with-libgphoto2=/usr
make
sudo make install
gphoto2 -v
...
gphoto2         2.4.99.2       gcc, popt(m), exif, no cdk, aa, jpeg, readline
libgphoto2      2.4.99.7       INCOMPLETE CAMLIB SET (canon ptp2), gcc, ltdl, EXIF
libgphoto2_port 0.10.0         gcc, ltdl, USB, serial without locking
Quick Start
After you have installed the latest libgphoto2, get piggyphoto from github:
git clone git://github.com/alexdu/piggyphoto.git
cd piggyphoto
Now run the test scripts from the piggyphoto main directory. Let's try a few of them:
Autodetect the camera
python autodetect.py

libgphoto2 version:
2.4.99.7
INCOMPLETE CAMLIB SET (canon ptp2)
gcc (C compiler used)
ltdl (for portable loading of camlibs)v
EXIF (for special handling of EXIF files)

detected cameras:
[('Canon EOS 550D', 'usb:002,039')]
Take a picture
python snap.py

Model : Canon EOS 550D
Status : 0
Port : 4
Operations : 25
File Operations : 10
Folder Operations : 14
USB (vendor/product) : 0x4a9/0x31ea
USB class : 0x0/0x0/0x0
Library : /usr/lib/libgphoto2/2.4.99.7/ptp2
Id : PTP

Saving preview.jpg
Saving snap.jpg
Live Preview
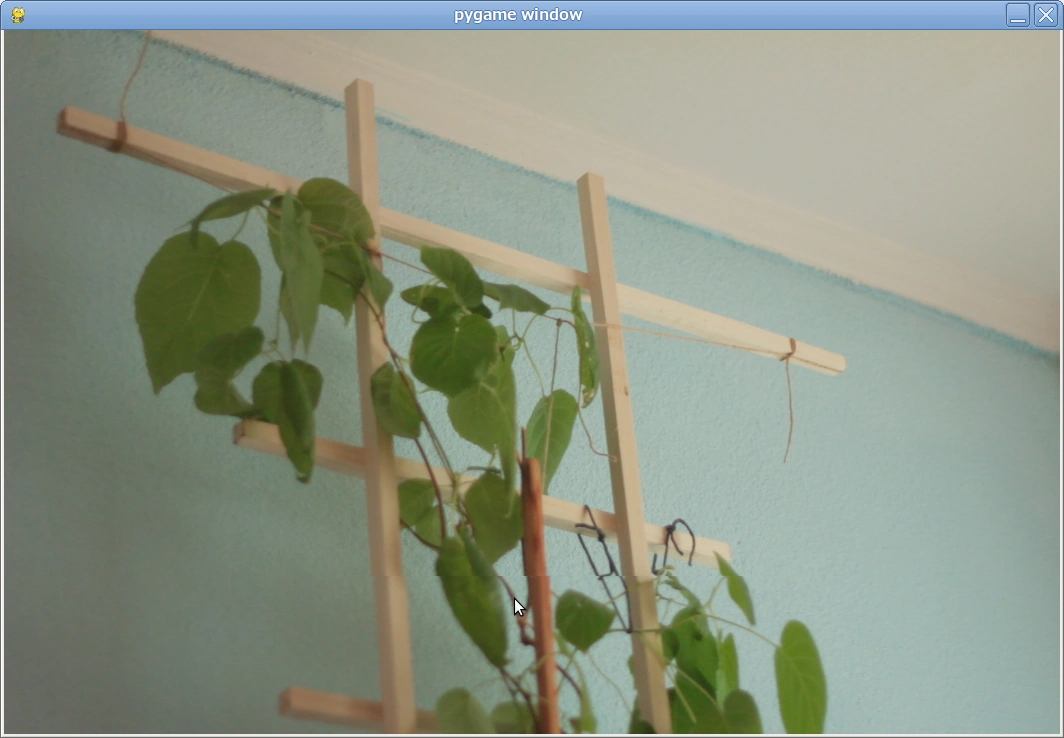
Live preview from 550D with piggyphoto
For this one you need Pygame:
sudo easy_install pygame
python preview.py
Now, your DSLR is behaving like a webcam :)
Trap Focus
Trap focus functionality was requested by Magic Lantern users:
http://bitbucket.org/hudson/magic-lantern/issue/160/trap-focus-functionality
- "Trap Focus" is great functionality found in Nikons [and Pentax] is missing in entire Canon lineup. When enabled it delays firing shutter until central point becomes in focus. From the user perspective when MF (together with "Trap Focus") is enabled user presses (and holds) shutter button. Nothing happens until central point becomes in focus. When it happens - camera takes picture. It's great in any situation with manual lens, but especially suited for sports and macro photography.
Here is an experiment for implementing trap focus in tethered shooting mode, with piggyphoto. It's not really useful in the current state, but if you like it, it may be implemented into Magic Lantern. It's really useful for macro shots and old manual lenses.
How to try it
Connect the camera via USB and run the script focus-snap.py:
python focus-snap.py
It will display a live preview. If you want to change settings, close the window, press the Live View button on the camera (while it's still connected to USB) and you can change shooting settings. Put a short exposure time, like 1/250, 1/500, to avoid motion blur. Then run the script again.
Look at the title bar of the preview window. It should display "Looking for focus peak". Now point the camera at some object and rotate the focus ring. The object will be focused; turn the ring a bit farther, and the object will become blurred. The title bar will say "Focus peak found". Now turn the focus ring back sloooooooowly and camera will take a picture when the object will come back into focus.
How it works
My implementation estimates the amount of focus on the live preview image, and take a picture when it detects a peak (well, almost).
Estimating focus for an image
The 550D outputs live preview frames which are 1056 x 704 pixels. The focus is computed from the central area of the image, having 100x100 pixels.
The function for evaluating the focus is implemented in focus.py:
def estimate(file, s=5):
    """Estimates the amount of focus of an image file.
    Returns a real number: higher values indicate better focus.
    Bug: a high-contrast, blurry image can be considered with better focus
    than a low-contrast, perfectly focused image.
    """
    im = Image.open(file).convert("L")
    w,h = im.size
    box = (w/2 - 50, h/2 - 50, w/2 + 50, h/2 + 50)
    im = im.crop(box)
    imf = im.filter(ImageFilter.MedianFilter(s))
    d = ImageChops.subtract(im, imf, 1, 100)
    return ImageStat.Stat(d).stddev[0]
The main idea is that if you blur a focused image, you will lose lots of details. But if you blur a blurred image, it won't change much. So, a measure for how much the image is in focus will be the difference between the original and slightly blurred image.
Problems:
- The focus measure is not absolute. Ideally, it should return a number between 0 and 1, with 0 = extremely blurry and 1 = perfectly focused. But not all lenses are able to give perfect focus, and the sampling rate is finite, so the algorithm may miss the sweet spot.
- The focus measure is dependent on the scene analyzed. A high-contrast, blurry image will be evaluated as being better than a low-contrast, perfect-focus image. This function just returns a number which, for the same scene, is greater when the image is focused.
Another solution, which seems better, is to use morphological opening or closing. I'll experiment with it.
Improvements to the focus estimation function (estimate in focus.py) are welcome.
Detecting focus peak
As a workaround for the focus measure not being absolute, I've implemented a slightly less easy-to-use procedure: you have to bring the object into focus, then defocus it, and then bring the object into focus again. This allows the algorithm to detect the peak value for the current scene, and snaps when the focus value is greater than 98% of the peak. If you turn the focus ring slowly enough, this seems to work (well... almost).
Limitations and known bugs
- If you turn the ring too fast, the image will be out of focus (because the picture is took too late). This is mainly due the communication delay between camera and PC, and slow implementation of focus evaluation function. It shouldn't be a problem if the method is implemented on the camera.
- If you change the scene, the camera may snap randomly, even if nothing is in focus.
- You have to bring the object into focus and continue turning the ring until the image blurs, and then turn the ring back.